Butter tarts
When I was a kid, my family would go to the Buckhorn, Ontario craft show every spring and fall. The show was filled with vendors selling everything from the kitschy (crochet everything) to the gorgeous (handmade cameo pins) to the vaguely horrifying (teddy bears dipped in wax). But there were two things that kept me coming back to every single show:
#1, Apple-pie scented candles. Not a sickly sweet or plasticly-scented apple pie-inspired candle, but a candle that actually smells like hot apple pie. The flour, butter, spices, sugar, fruit,- all spot-on.
#2, Butter tarts. Oh, the butter tarts. Buttery, flakey, sticky, dripping sugar, and oh so addictive.
I would eat so many butter tarts that I would get a ripping stomach ache from consuming way too much sugar in way too short of a time and have to lay down, consumed with self-pity and regret, until it passed. But then the second I felt better, low and behold, I'd eat another butter tart or two,- and then maybe get another stomach ache,- before calling it quits for the day. For me butter tarts have always been just like a shiny little self-destruct button. And me? Well, I'm just a silly little magpie. I just can't resist!
Since I'm up north of the city right now, I thought it only apropos that this next blog post feature those cottage country dessert favourites, butter tarts. In my recipe, I add a smidgeon of pumpkin pie spice,- aka. a mixture of allspice, cinnamon, cloves, nutmeg and ginger,- to the pastry dough, which adds an extra oh-so-subtle layer of flavour to the tarts. Ditto with the inclusion of a touch of cardamom to the butter tart filling, which adds an almost-imperceptible complexity to the whole thing. These additions to the classic butter tart formula are so subtle that it's basically impossible for anyone eating them to pick out anything specific about what makes these tarts different, other than that they're wildly delicious and hint at a sophistication that sets them apart from your childhood favourites.
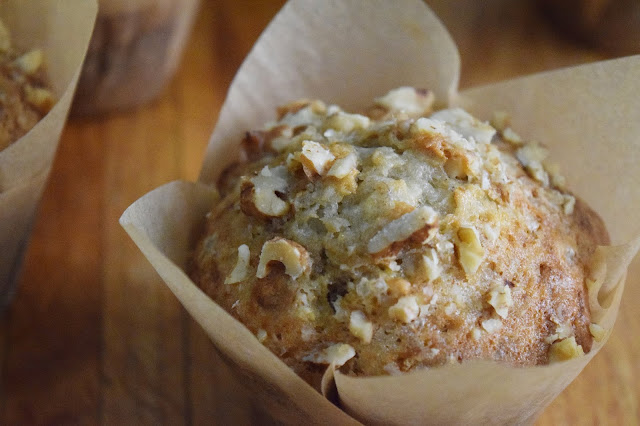
And so I give you a recipe for butter tarts, the quintessentially, iconically Canadian dessert that is marked by its flakey, buttery crust and its sticky, buttery-rich, caramelized-sugary filling. Yeah, it's delicious. Make them ahead and freeze them for a rainy day or, alternatively, eat too many and then have a little lay-down on the couch. Your call!

1. Fill a measuring cup with water. Add in a few ice cubes and set the water aside to chill thoroughly while you continue making the dough.

2. In a large bowl, add the flour, sugar, salt and pumpkin pie spice and whisk together.

3. Add the cubed, cold butter to your flour mixture. Using a pastry blender or sharp-edged potato masher, blend, mix, smoosh and cut the butter into the flour mixture until the butter pieces are the size of tiny peas. Your goal here is to work as evenly and quickly as possible so that the butter doesn't have time to get warm and melt,- it'll be the tiny pockets of cold butter in your dough that will make it flakey and buttery and oh-so-irresistible once it's been baked!
*Note: if you have a food processor, simply pulse the butter-flour mixture in your food processor until the butter is the size of tiny peas. Easy peasy.


4. Drizzle 1/2 cup of the extremely-cold water into the flour-butter mixture. Knead the mixture together, - working quickly so that you don't warm it up too much with your hands,- until it comes together with a firm, play-doughy type of consistency. If the mixture is too dry, add a touch more water (add no more than an additional 1 tbsp at a time). When the mixture has come together, stop kneading,- don't overwork the dough, or it'll get tough.
5. Divide the dough in half and shape into disks. Wrap the disks in plastic wrap and let the dough rest and chill in the fridge for an hour or two.

For the butter tart filling:
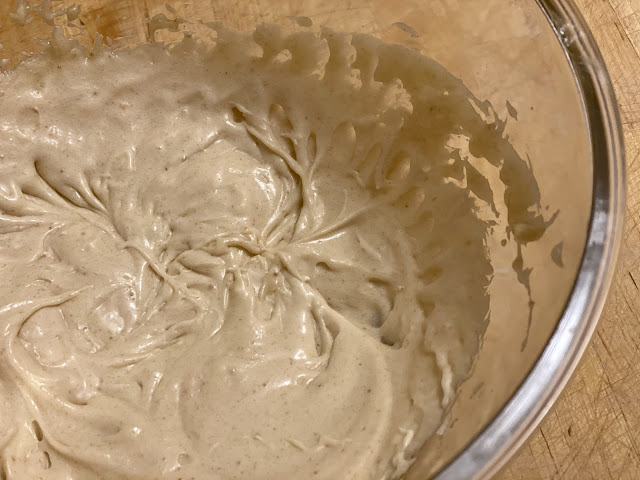
1. In a medium-large bowl, cream together the softened butter, brown sugar, salt and corn syrup with a hand mixer until the mixture is homogenous.
*Note: If adding raisins to your butter tarts, place them in a cup with hot water and set them aside, allowing them to soak while you continue to prepare the filling.

2. Add the eggs, vanilla and cardamom to the butter mixture and mix well.
3. Add any desired optional add-ins to the filling mixture at this point and stir well. Mix and match to your heart's content, but make sure that you add in no more than 1/2 cup total to the mixture or it'll cause your butter tarts to overflow. If using raisins, drain them from the hot water, gently squeeze out the excess moisture (careful, it's hot!) and allow them to cool for a few minutes before stirring them into the filling mixture.
Roll out the dough and cut into 4" circles:
1. Preheat the oven to 400*F
2. Lightly flour your work surface and remove one of the pie disks from the refrigerator Using a floured rolling pin, roll your pie dough out to approximately 1/8" thickness, rotating your dough periodically to make sure that it rolls out evenly as well as to ensure that it isn't sticking to the work surface below. If you find that your dough is sticking, add a bit more flour to your work surface before continuing to roll the dough out.
*Note: Don't add too much flour while rolling your dough out or your dough will come out tough.

3. Using a circular cutter or a large-rimmed glass, cut out 4" circles from the dough. Set them aside on a plate and place in the fridge to keep them cool (and thus, super flakey once baked).

4. Gather the leftover dough scraps from dough disk 1 and re-form them into a disk. Re-wrap the disk in plastic wrap and put it back in the fridge to chill while you continue working.
5. Remove the second, untouched dough disk from the fridge and repeat steps 2 and 3, rolling it out to 1/8" thickness and cutting out 4" circles from the dough. Place the circles on the plate with the others and back in the fridge.
6. Gather the leftover dough scraps from dough disk 2 and re-form them into a disk. Re-wrap it in plastic wrap and put it back in the fridge to chill while you continue working.
7. Dough disk 1 from the fridge again and repeat steps 2 and 3, rolling it out to 1/8" thickness and cutting out 4" circles from the dough. Add the circles to the plate with the others and back in the fridge while you finish up. Discard any remaining scraps from dough disk 1 (unfortunately, the dough would be overworked at this point and would bake to be tough should you re-roll it again).
8. Remove dough disk 2 from the fridge again and repeat steps 2 and 3, rolling it out to 1/8" thickness and cutting out 4" circles from the dough. Add the dough circles to the plate with the others and discard any remaining dough scraps from dough disk 2.

Assemble the butter tarts:
1. Fit the dough circles into the cups of a regular-sized muffin tray, pleating them a bit as necessary in order for them to fit neatly (alternatively, pleat them much as your heart desires for purely aesthetic purposes). It also helps to use a shot glass to gently push the dough down in the centre of the pan.
*Note: There's no need to butter the muffin tins,- the butter in the pie dough does it the job for you as it bakes.
2. Add 1.5 tbsp of the butter tart filling (2 tbsp if you've included any add-ins) to each dough-filled muffin tin.

3. Bake the butter tarts one tray at a time on the middle rack of a preheated 400*F oven for 15-20 minutes. If you like your butter tarts on the runnier side, bake them until the tart filling is browned but still bubbling. If you like your butter tarts on the firmer side, add an additional few minutes once it gets to the browned-and-bubbling stage.
*Note: The filling will puff up and dome when it's cooking,- don't be alarmed! This is totally normal and the tarts will deflate once they've cooled.

4. Allow the butter tarts to cool in the muffin pans for 10 minutes before removing them, setting them on a wire rack and allowing them to cool completely before eating way too many. Enjoy!!!

#1, Apple-pie scented candles. Not a sickly sweet or plasticly-scented apple pie-inspired candle, but a candle that actually smells like hot apple pie. The flour, butter, spices, sugar, fruit,- all spot-on.
#2, Butter tarts. Oh, the butter tarts. Buttery, flakey, sticky, dripping sugar, and oh so addictive.
I would eat so many butter tarts that I would get a ripping stomach ache from consuming way too much sugar in way too short of a time and have to lay down, consumed with self-pity and regret, until it passed. But then the second I felt better, low and behold, I'd eat another butter tart or two,- and then maybe get another stomach ache,- before calling it quits for the day. For me butter tarts have always been just like a shiny little self-destruct button. And me? Well, I'm just a silly little magpie. I just can't resist!
Since I'm up north of the city right now, I thought it only apropos that this next blog post feature those cottage country dessert favourites, butter tarts. In my recipe, I add a smidgeon of pumpkin pie spice,- aka. a mixture of allspice, cinnamon, cloves, nutmeg and ginger,- to the pastry dough, which adds an extra oh-so-subtle layer of flavour to the tarts. Ditto with the inclusion of a touch of cardamom to the butter tart filling, which adds an almost-imperceptible complexity to the whole thing. These additions to the classic butter tart formula are so subtle that it's basically impossible for anyone eating them to pick out anything specific about what makes these tarts different, other than that they're wildly delicious and hint at a sophistication that sets them apart from your childhood favourites.
And so I give you a recipe for butter tarts, the quintessentially, iconically Canadian dessert that is marked by its flakey, buttery crust and its sticky, buttery-rich, caramelized-sugary filling. Yeah, it's delicious. Make them ahead and freeze them for a rainy day or, alternatively, eat too many and then have a little lay-down on the couch. Your call!
Butter Tarts

Makes: 22 pieces Prep time: 1.5 hrs Total time: 2.25 hrs
Ingredients:
For the pie dough:- 3 3/4 cup (472 grams) flour
- 1.5 tablespoon sugar
- 1.5 teaspoon table salt
- 1/8 tsp of pumpkin pie spice
- 1 1/2 cup (337.5 grams) unsalted butter, very cold and cut into cubes
- 1/2c (113.5 g) unsalted, softened butter
- 1/2 cup brown sugar
- 1/8 tsp salt
- 1 cup golden corn syrup
- 2 eggs, lightly beaten
- 1 tsp vanilla
- 1/8 tsp ground cardamom
Optional add-ins (mix and match, but no more than 1/2 cup total):
- 1/2 cup golden raisins
- 1/2 cup of finely chopped walnuts
- 1/2 cup of finely chopped pecans
- 1/2 cup mini semisweet chocolate chips
- 5 bacon strips, cooked until crispy and finely chopped
- 1 tsp maple extract
Directions:
For the pie dough:1. Fill a measuring cup with water. Add in a few ice cubes and set the water aside to chill thoroughly while you continue making the dough.

2. In a large bowl, add the flour, sugar, salt and pumpkin pie spice and whisk together.

3. Add the cubed, cold butter to your flour mixture. Using a pastry blender or sharp-edged potato masher, blend, mix, smoosh and cut the butter into the flour mixture until the butter pieces are the size of tiny peas. Your goal here is to work as evenly and quickly as possible so that the butter doesn't have time to get warm and melt,- it'll be the tiny pockets of cold butter in your dough that will make it flakey and buttery and oh-so-irresistible once it's been baked!
*Note: if you have a food processor, simply pulse the butter-flour mixture in your food processor until the butter is the size of tiny peas. Easy peasy.


4. Drizzle 1/2 cup of the extremely-cold water into the flour-butter mixture. Knead the mixture together, - working quickly so that you don't warm it up too much with your hands,- until it comes together with a firm, play-doughy type of consistency. If the mixture is too dry, add a touch more water (add no more than an additional 1 tbsp at a time). When the mixture has come together, stop kneading,- don't overwork the dough, or it'll get tough.
5. Divide the dough in half and shape into disks. Wrap the disks in plastic wrap and let the dough rest and chill in the fridge for an hour or two.

For the butter tart filling:
1. In a medium-large bowl, cream together the softened butter, brown sugar, salt and corn syrup with a hand mixer until the mixture is homogenous.
*Note: If adding raisins to your butter tarts, place them in a cup with hot water and set them aside, allowing them to soak while you continue to prepare the filling.

2. Add the eggs, vanilla and cardamom to the butter mixture and mix well.

3. Add any desired optional add-ins to the filling mixture at this point and stir well. Mix and match to your heart's content, but make sure that you add in no more than 1/2 cup total to the mixture or it'll cause your butter tarts to overflow. If using raisins, drain them from the hot water, gently squeeze out the excess moisture (careful, it's hot!) and allow them to cool for a few minutes before stirring them into the filling mixture.
Roll out the dough and cut into 4" circles:
1. Preheat the oven to 400*F
2. Lightly flour your work surface and remove one of the pie disks from the refrigerator Using a floured rolling pin, roll your pie dough out to approximately 1/8" thickness, rotating your dough periodically to make sure that it rolls out evenly as well as to ensure that it isn't sticking to the work surface below. If you find that your dough is sticking, add a bit more flour to your work surface before continuing to roll the dough out.
*Note: Don't add too much flour while rolling your dough out or your dough will come out tough.

3. Using a circular cutter or a large-rimmed glass, cut out 4" circles from the dough. Set them aside on a plate and place in the fridge to keep them cool (and thus, super flakey once baked).

4. Gather the leftover dough scraps from dough disk 1 and re-form them into a disk. Re-wrap the disk in plastic wrap and put it back in the fridge to chill while you continue working.
5. Remove the second, untouched dough disk from the fridge and repeat steps 2 and 3, rolling it out to 1/8" thickness and cutting out 4" circles from the dough. Place the circles on the plate with the others and back in the fridge.
6. Gather the leftover dough scraps from dough disk 2 and re-form them into a disk. Re-wrap it in plastic wrap and put it back in the fridge to chill while you continue working.
7. Dough disk 1 from the fridge again and repeat steps 2 and 3, rolling it out to 1/8" thickness and cutting out 4" circles from the dough. Add the circles to the plate with the others and back in the fridge while you finish up. Discard any remaining scraps from dough disk 1 (unfortunately, the dough would be overworked at this point and would bake to be tough should you re-roll it again).
8. Remove dough disk 2 from the fridge again and repeat steps 2 and 3, rolling it out to 1/8" thickness and cutting out 4" circles from the dough. Add the dough circles to the plate with the others and discard any remaining dough scraps from dough disk 2.

Assemble the butter tarts:
1. Fit the dough circles into the cups of a regular-sized muffin tray, pleating them a bit as necessary in order for them to fit neatly (alternatively, pleat them much as your heart desires for purely aesthetic purposes). It also helps to use a shot glass to gently push the dough down in the centre of the pan.
*Note: There's no need to butter the muffin tins,- the butter in the pie dough does it the job for you as it bakes.
2. Add 1.5 tbsp of the butter tart filling (2 tbsp if you've included any add-ins) to each dough-filled muffin tin.

3. Bake the butter tarts one tray at a time on the middle rack of a preheated 400*F oven for 15-20 minutes. If you like your butter tarts on the runnier side, bake them until the tart filling is browned but still bubbling. If you like your butter tarts on the firmer side, add an additional few minutes once it gets to the browned-and-bubbling stage.
*Note: The filling will puff up and dome when it's cooking,- don't be alarmed! This is totally normal and the tarts will deflate once they've cooled.

4. Allow the butter tarts to cool in the muffin pans for 10 minutes before removing them, setting them on a wire rack and allowing them to cool completely before eating way too many. Enjoy!!!