Latkes
"When life gives you potatoes, make latkes."
- unknown
So we order a box of locally-grown vegetables that gets delivered every two weeks. It doesn't save me from having to go grocery shopping regardless (I always need something), but I like the fact that it supports local farmers and features tasty, seasonal vegetables. And the fact that it gets delivered right to my front door? Can't beat it, especially nowadays. What I love the most, though, is that I never know what I'm going to get in the box until I open it up, which frees me from having to decide which vegetables I'm going to be eating that week. It's more like: "Oh, cabbage? Ok, let's do something with a slaw. What do you feel like? Cuban..? Jamaican...? Southern...? BBQ...?". It's kind of like vegetable Russian Roulette.
If you're reading this right now and thinking "ok, but I don't know how to cook certain vegetables. I'm not going to use them. Getting a box of random vegetables delivered doesn't make sense for me," I have the answer. Cooks Illustrated came out with a cookbook a few years ago called Vegetables Illustrated. This cookbook might very well be the most practical cookbook I own, which is saying something. It has a chapter for any and every vegetable you can think of (as well as many you probably didn't know existed) along with descriptions and diagrams on how to clean and store them, details on which parts are edible/best used for what and a number of easy, tasty recipes featuring that vegetable. I honestly can't recommend it highly enough as a household cookbook staple for anyone who wants to expand their vegetable repertoire. Here's the link if you're interested in checking it out:
www.chapters.indigo.ca/en-ca/books/vegetables-illustrated-an-inspiring-guide/9781945256738-item.html
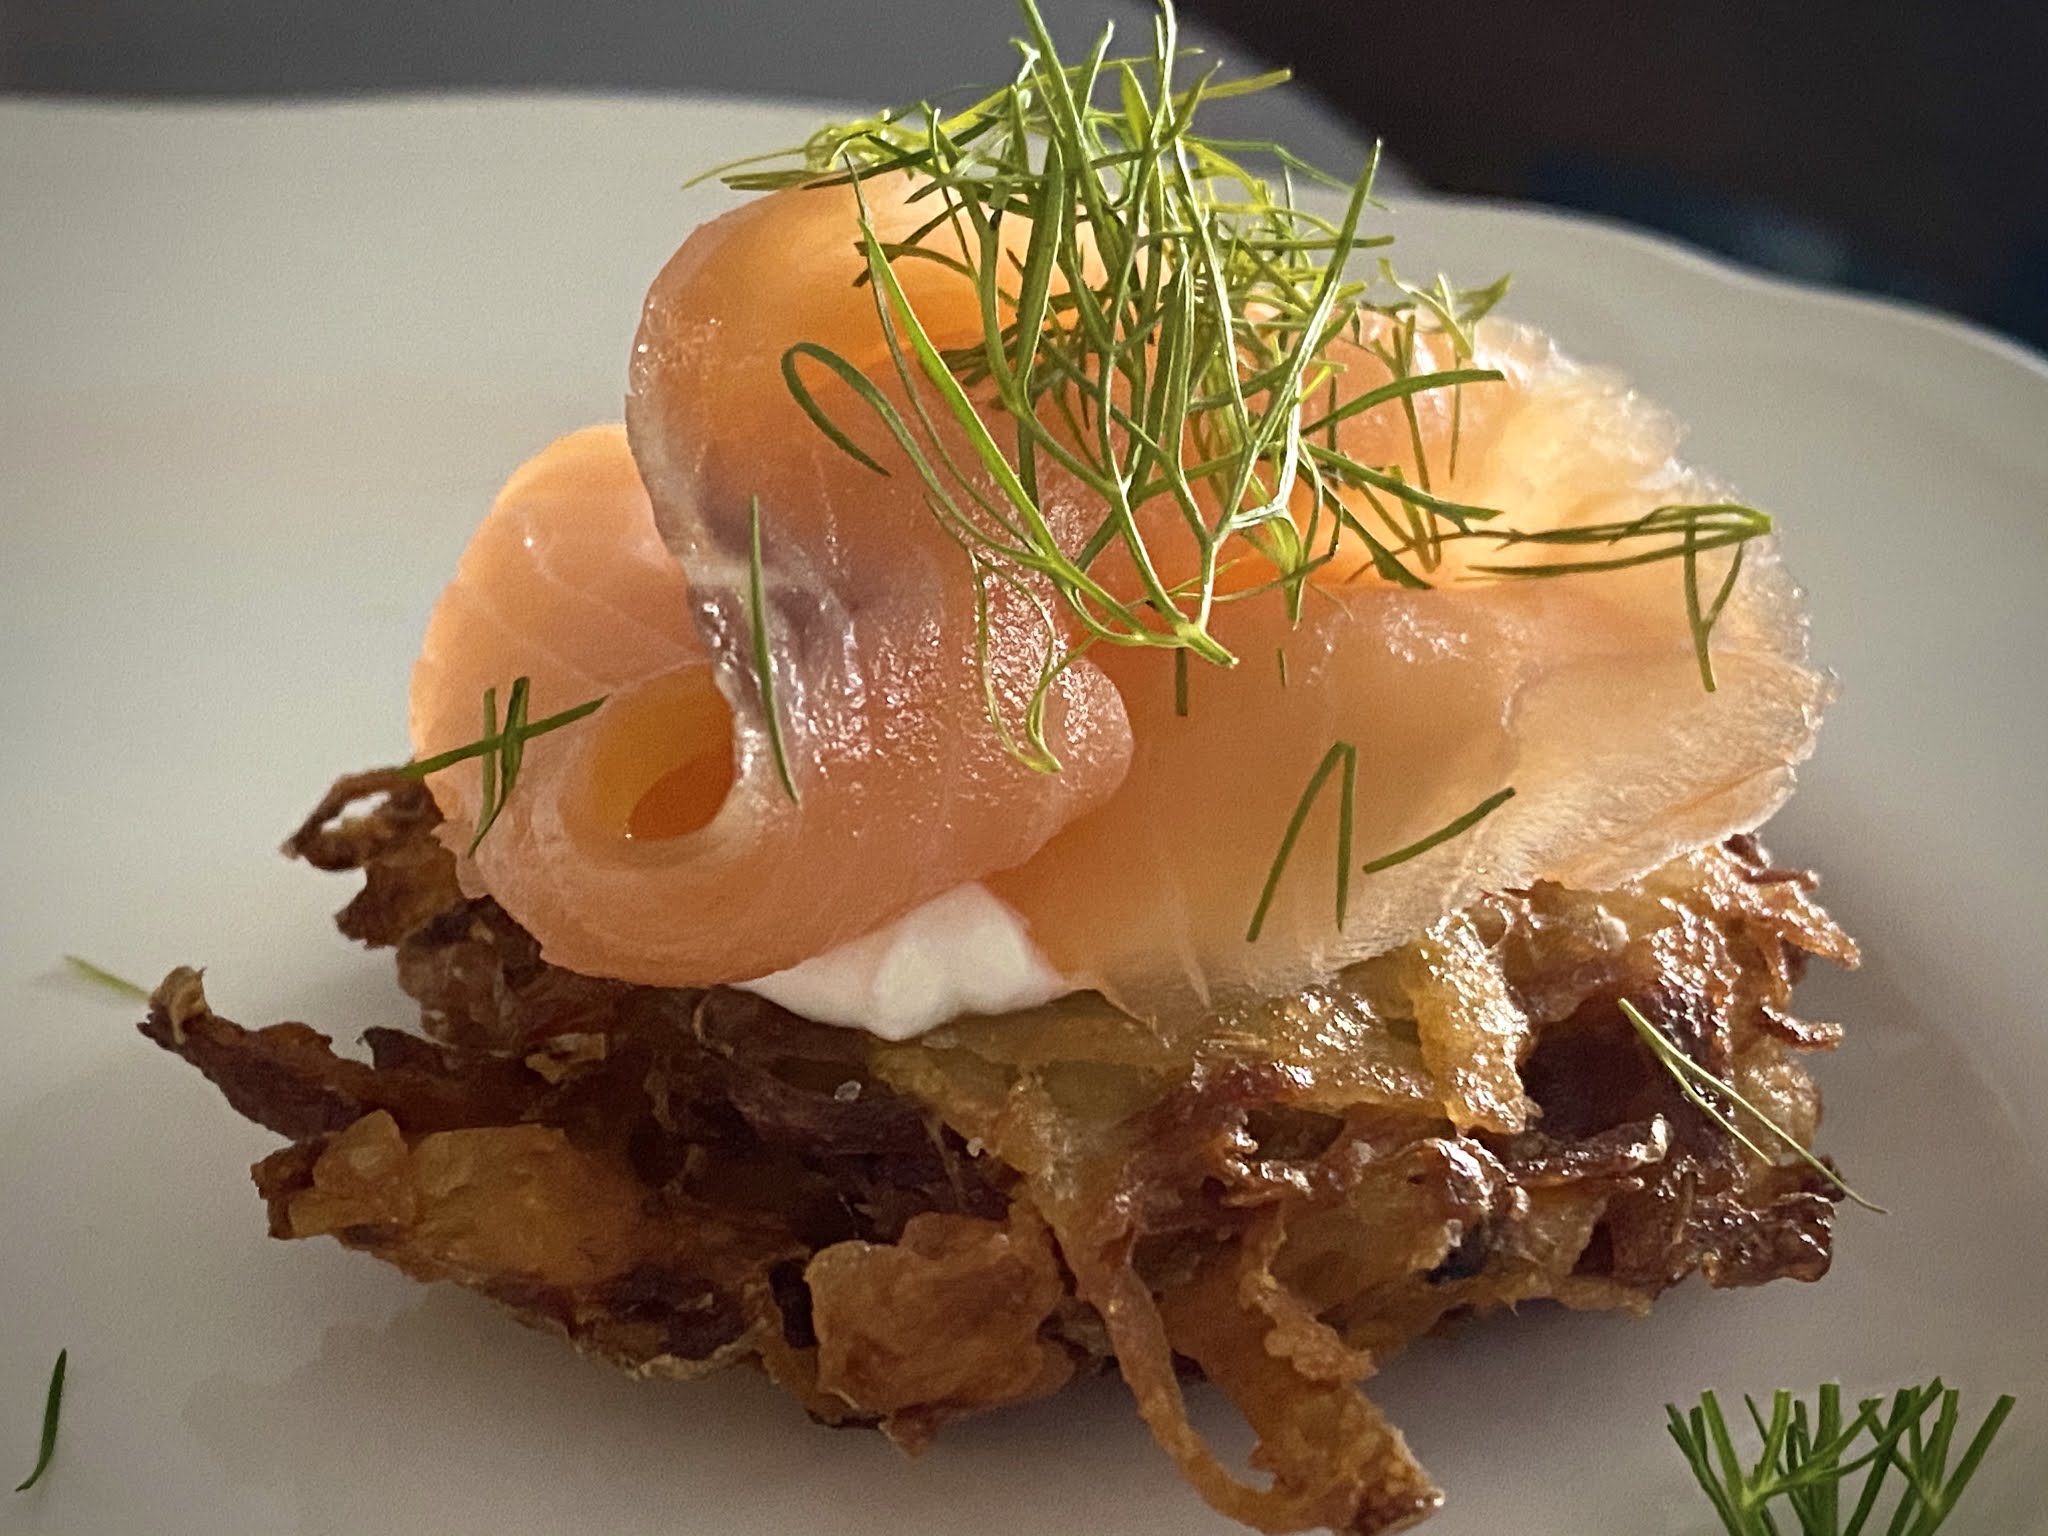
Getting back to the vegetable box, there is a downside to getting a seemingly random box of vegetables delivered to you periodically. That downside, hilariously enough, is so many freaking potatoes. Other things will vary to different degrees and there are certain vegetables that appear more often than others (celery, onions, etc), but there are always, always potatoes. And though I love potatoes, I've found myself in the position of having an excess more and more in the last few months as I've been trying to incorporate more greens and less starches in our weeknight dinners. But then what to do with all the potatoes? The answer to this conundrum is a variety of amazing weekend breakfasts, but specifically latkes with cold-smoked salmon, cream cheese, dill and pickled red onions. I've gone through a ton of latke recipes with endless variations trying to find the perfect classic latke. In my humble option, this one is it.
And so, with Mother's day just around the corner, I bring you my latkes recipe for a super tasty, quick and easy breakfast/brunch option that has the added bonus of seeming way fancier than it is. It's vegan, dairy-free and gluten-free, uses ingredients that you probably already have in the fridge, is endlessly-customizable re: toppings and requires absolutely no special equipment. And if you want to prep them ahead of time and drop them off for someone to enjoy later, it's not a problem,- just follow the instructions at the bottom of the post. This is the ultimate staple recipe for anyone else who consistently finds themselves with way, way, way too many potatoes. You are my tribe.
Latkes

Makes: 5 large pcs Serves: 2 as a main Prep time: 15 mins Total time: 25 mins
- 450g russet potatoes, approximately 3 pcs depending on size
- 1 large egg, whisked
- 1/4 tsp kosher sea salt, plus more to finish
- vegetable or canola oil, for frying
optional add-ins, choose one:
- 1/4c/ 32g diced white or red onion
- 1/4c/ 14g chopped fresh scallions or chives
Directions:
1. Prepare the area around your stovetop for your frying session: firstly, place a wire tray on a paper towel-lined baking sheet and set it aside. Secondly, turn on your oven's warm function or, alternatively, preheat it to 150* F. Next, place a spatula on a small plate beside the stovetop,- you're going to need it. And lastly, fill a sauté pan (aka a deep-sided frying pan) 1/4" to 1" high with vegetable or canola oil. Leave everything set-up and set aside until the rest of your prep is done.

2. Using the large-holed side of a box grater, grate the potatoes into a large bowl lined with a clean kitchen towel. You should have around 4 cups of shredded potatoes.
3. Wrap the shredded potatoes in the clean towel and tightly and repeatedly squeeze it out to remove and discard as much of the excess moisture as possible. This step results in super crispy latkes, so don't skimp on the squeezing! Your potatoes might turn reddy-brown at this point as they oxidize- not to worry, this is totally normal and won't affect the tastiness of your finished product.
4. Toss the wrung-out, shredded potatoes back into the bowl and add 1/4 tsp of salt, the whisked egg and the (optional) chives/scallions or diced onion. Mix the ingredients well to combine.

5. Heat the oil in your sauté pan over medium to medium-high heat (depending on the strength of your stovetop) until the oil begins to shimmer. If you're unsure as to whether the oil is the right temperature, you can test it by putting the handle of a wooden spoon into the oil- if the oil is hot enough to fry, bubbles will form around the handle.
6. Scoop up 1/3 c of the potato mixture and pack it tightly into a patty, once again squeezing out the excess moisture as you do so. Gently place the patty into the hot oil with your spatula and flatten it a bit. Repeat the process to form a few more potato patties and place them in the pan as you go.
Note: don't overcrowd the pan or the latkes won't crisp up properly!
7. Fry the latkes until their edges are lightly browned and appear lacy, 2-3 minutes. Carefully flip the latkes and cook for an additional 2-3 minutes, or until the other side is equally browned. Ensure that you're constantly monitoring the oil temperature and adjusting the heat of the stovetop while you're frying as too-hot oil will result in latkes with burnt outsides and raw middles, while oil that isn't hot enough will result in greasy latkes.
8. Once the latkes are cooked, use the spatula to transfer them to your prepared wire rack. Sprinkle them with a bit of sea salt and pop the baking sheet in the preheated oven to keep the finished latkes warm while you finish frying the rest.
9. Check your oil in-between batches and replace it if it's dark brown or excessively filled with burnt bits. Simply discard the old oil, wipe out your pan with a bit of paper towel, fill it with fresh oil and heat it back up over medium/medium-high heat before continuing to fry.

10. Serve the latkes warm alongside savoury toppings such as cream cheese, chopped fresh dill, chopped scallions, pickled red onions, capers, sliced cucumber, sour cream, caviar and smoked salmon. Alternatively, sweet toppings like fresh ricotta, sliced pear and a drizzle of honey or a smear of preserves are a tasty accompaniment to a crispy, salty potato base. Enjoy!
To prepare the latkes in advance: follow the instructions above to prepare and cook the latkes, but allow the latkes to cool completely on the wire trays instead of keeping them warm. Once they've cooled, transfer the latkes to a foil-lined baking sheet, cover the tray with a sheet of foil and refrigerate if it's going to be some time before they're going to be heated up again. Once you're ready to enjoy them, preheat the oven to 350* f, remove the top sheet of foil and bake for 6 minutes. Flip the latkes and bake for an additional 5-10 minutes, or until the latkes are crispy and warmed through. Enjoy!